Feature Label 1

Feature Label 2

Feature Label 3

2nd Feature Label

What's Latest and Fresh in?
FOOD AJIP

Wednesday, January 3, 2018

Cream Cheese Stuffed Chicken Breast

Cream Cheese Stuffed Chicken Breast is an easy meal to prepare and very delicious, too. You can also wrap the stuffed chicken breast with your favorite hickory smoked bacon.

Ingredients

     
  • 4 chicken cutlets, split
  • 1 (8 oz.) pkg. cream cheese
  • Chives

Coating Mix
  • 1 cup of bread crumbs
  • 1 tsp. garlic powder
  • 1/2 tsp. basil
  • 1/2 tsp. oregano
  • 2 tsp. grated Parmesan cheese
  • salt and pepper to taste

Instructions
  1. lay the 4 cutlets (8 pieces) flattened on wax paper
  2. divide cream cheese into 8 slices
  3. place a slice on each chicken cutlet
  4. sprinkle with chives
  5. roll up and secure with toothpick
  6. roll in coating mix
  7. place in slightly greased baking dish
  8. drizzle with melted butter
  9. shake on Parmesan cheese
  10. bake at 375 degrees F. for 40-50 minutes

Bon Appetite!

Cajun Black-Eyed Peas, Cabbage and Pork Chops - A New Year's Tradition

Black-Eyed Peas


      Ingredients

  • 1 lb. dried black-eyed peas
  • 2 slices of hickory smoked bacon
  • 2 Tbsp onions, minced
  • 2 Tbsp bell pepper, minced
  • 1 tsp garlic, minced
  • 1 tsp Colgin liquid smoke
  • Water
  • Salt and pepper to taste.

As is the case with thousands of other families across America, I also take part in the annual tradition of cooking-up a mess of black-eyed peas and cabbage in an effort to increase my luck for the coming New Year. Heaven knows we are gonna need all we can muster-up.

Contrary to popular belief, black-eyed peas don't have to be soaked over night or for any significant period of time because the peas have a thin skin and are relatively easy to cook.

Over medium (or lower) heat, black-eyed peas can be done in just a few minutes. It's the pot liquor that makes all the difference in how your peas will taste, however.

Think 'minced' and not 'chopped' when it comes to your vegetables. A couple tablespoons of minced onions and bell pepper - and about 1 teaspoon of minced garlic sautéed in the fat from a couple slices of smoked bacon creates a wonderful flavor and delicious taste. And, you can salt and pepper to your own liking.

Using a 2 quart pot begin by adding just enough water to cover the peas and sautéed vegetables by about an inch,  (or by a finger and a half as we say in Cajun speak),  and begin the slow process of cooking them to perfection, while stirring occasionally (around 1 - 1 1/2 hrs.). Keep an eye on the peas because you may have to add a little more water occasionally as they absorb and cook.You will know when they become tender enough by taste-testing.

Set them aside until the boiled cabbage is done.

A pound of dried black-eyed peas, when cooked, should yield between 5 and 6 cups.


Cabbage

Ingredients

  • 1 head of cabbage, leaves separated
  • 3 or 4 pork chops
  • 2 Tbsp oil
  • 1 Tbsp Colgin liquid smoke (hickory)
  • 1 measure DIY Cajun Seasoning
  • Additional salt and pepper (if desired) 

Cooking cabbage (boiled) is also easy to do and the way I prepare my cabbage, by popular demand I might add, is to include 3 or 4 pork chops with it. This is how I prepare my boiled cabbage.

The first thing I do is to season the heck out of the pork chops with one measure of DIY Cajun Seasoning (easy to make - check it out), and fry them up in my cast-iron skillet on medium-high heat in a couple tablespoons of oil.

I fry the chops for a couple minutes on both sides until they are well browned, but I don't cook them all the way because they will finish cooking with the slow-boiling cabbage.

The next thing I do is get my kitchen shears and cut-up the chops into bite size pieces and add this to the boiling cabbage.

If you are using a heavy cast-iron skillet, chances are in your favor that a crust will form at the bottom of the skillet (it usually does when you cook meat fast on high heat).This is a good thing.

We Cajuns call this crusty material the 'gratin' - which is commonly used to compliment and enhance the flavor of various meat gravies.

Here's a little secret: keep the skillet hot but add in about 2 or 3 ice cubes and stir them around the skillet and they will magically loosen the crust (or 'gratin') and will produce a savory bouillon that you can add to the cabbage mixture to enhance the overall flavor.

Once you have liquefied the crust and added it to the stock pot along with the cabbage leaves and cut-up pork chops, you just go about your business of boiling cabbage like you always have (low and slow).  Adding a little salt and black pepper always helps.

I like to also include a tablespoon of Colgin liquid smoke (hickory flavor) and not that other brand. Keep mixing and tumbling the cabbage leaves in the pot occasionally so they don't burn. The only difference with cooking cabbage this way instead of the traditional way is that you now have a delicious pot liquor and a few bites of meat to go with your good luck food.

See there! Your luck is already changing. Enjoy! Happy New Year! Ahheee!!

Mardi Gras King Cake Recipe

I must confess. I have never baked a King Cake, but I do eat them and they are delicious.

My friend Danno at NolaCuisine.com has graciously allowed me to post his King Cake recipe here for your enjoyment. Thanks for sharing, Dan! BTW, visit his site when you get the chance. There you will find an awesome display of great New Orleans style dishes to soothe the soul.

King Cake Recipe

For the Brioche:

     
  • 1 envelope active dry yeast
  • 2 Tbsp warm water (115 degree F)
  • 1 tsp iodized salt
  • 2 Tbsp granulated sugar
  • 1/4 cup milk
  • 2 tsp orange zest, minced
  • 2 cups all-purpose flour, sifted
  • 1 tsp cinnamon
  • 2 eggs, beaten
  • 1 1/4 sticks cold unsalted butter, cut into very small dice
  • 1 egg beaten and 2 Tbsp water, for the egg wash
  • 1 plastic baby trinket

Dissolve the yeast in the work bowl of a stand mixer fitted with the dough hook attachment, let stand until frothy. Dissolve the salt, sugar, orange zest and milk in a small bowl. When dissolved combine the milk mixture with the yeast mixture. Mix the cinnamon with the flour.

With the mixer on low speed, add the eggs, then gradually add the flour, until all is incorporated. Knead on low speed for 10 minutes, or until a smooth elastic dough is formed. A little more flour may be necessary. With the motor running, incorporate the butter into the dough, a little at a time but rather quickly so that it doesn’t heat up and melt.

Turn the dough into an oiled bowl, loosely cover with plastic wrap and let rise for 1 hour in a warm spot. When the dough has doubled in bulk punch it down, cover and place in the refrigerator overnight.

Preheat the oven to 350 degrees F.

Roll the dough out to a 6 x 18 inch rectangle. Spread the Pecan filling (recipe below) out in the middle of the rectangle along the whole length, leaving about 1 1/2 inch on each side. Place the baby trinket somewhere with the filling. Fold the length of the dough over the filling and roll up tightly, leaving the seam side down. Turn the roll into a circle, seam side down and put one end inside of the other to hide the seam, and seal the circle. Place the cake on a baking sheet and let rise, loosely covered with plastic wrap, for 45 minutes or until doubled in bulk.

Brush all over with the egg wash, then place the king cake into the oven and bake for 30 minutes or until golden brown.

When the cake cools, brush with some of the glaze (recipe below) thinned out with more cold water. This will help the sugars adhere. Decorate the cake with the colored sugars and drizzle some of the thicker glaze onto the cake.

Place on a large round serving plate and decorate with Mardi Gras beads, doubloons and whatever else that you like.

For the Pecan filling:

  • 1 cup pecan halves, broken up slightly and roasted until fragrant
  • 2/3 cup brown sugar
  • 1 tsp vanilla extract
  • 1 tsp cinnamon
  • 1/2 tsp ground allspice
  • 1 pinch of salt
  • 4 Tbsp Steen’s Cane Syrup

Combine all of the ingredients together.

For the glaze:

1/2 cup powdered sugar
1 Tbsp bourbon
water (enough to make a paste that can be drizzled)

Combine the sugar and bourbon, whisk in enough water to make a glaze that can be drizzled.

Happy Mardi Gras ! ... Ahheee!!

How to Boil Shrimp, Crabs or Crawfish

Boiled Shrimp
If you know how to boil shrimp, crabs or crayfish the way Cajuns do it, then you are in for a delicious treat. As we are heading into the 2017 harvest, get ready to impress your family and friends with this traditional method of preparing them. It's easy and fun.

To do an exemplary job we must include the right kind of seasoning to the water in which the shrimp, crab or crayfish are to be boiled but not before purging them first using cool clean water and regular table salt, for a few minutes, in a different container. Our family and friends have regularly used a #2 galvanized washtub for that occasion.

Boiled Crab
The saline solution during the purging process, especially for crawfish, causes the crustaceans to regurgitate any of the pond water from which they were harvested, and the thrashing around for a few minutes while in the salt water solution helps to clean the underpart of the mudbug and crab shells and tails which will sometimes collect tiny bits of muddy or sandy residue. You may want to stir them around a bit with a broom handle or long spoon to help them along if you would like to speed up the cleaning process. This will agitate them and the water.


Boiled Crawfish
The basic seasonings for the boil consist of salt, ground red cayenne pepper, and black pepper (easy on the black pepper, tho). This is the secret of bringing out the flavor of boiled seafood as served by Louisiana Acadians (Cajuns). It is important to remember that these types of seafood will completely cook in a short period of time. Overcooking can cause problems with texture, taste and the ability to easily peel or clean them. So, take precautions.


Instructions
  
The seasonings presented herein were our own family's special blend which we used long before Zatarain's seasoning became a popular brand.
  1. bring your seasoned water to a boil in a large pot then add the shrimp, crabs or crayfish
  2. bring to a boil again and cook rapidly for 5 minutes in a large uncovered pot
  3. be sure to have enough water to cover the seafood
  4. remove from heat, cover the pot and let them set in the hot seasoned water for about 5 minutes
  5. the covered pot will retain the heat while the mud bugs, shrimp or crab cools. This allows them to absorb more of the seasoned water in which they were boiled 
  6. spread a few sheets of newspaper on a large table and evenly lay the seafood out within reach of your dinner guests
  7. don't forget to add containers around to collect the discarded shells after eating 

Tip: Remember to boil only live crayfish or crabs. Discard any dead ones before hand. They certainly won't taste good, and they could make you sick. So, get rid of the dead ones.

When boiling a large amount of crayfish or crabs (20 lbs. or more) you may want to add small new potatoes, small to medium size onions, hot smoked pork sausage (hot Italian sausages are the best) cut into 2-inch links, and you may even include corn on the cob. We've added eggs on occasion to add a little more stuff to the pot. Be sure to have plenty of cold beer on hand to tame the hot seasoning.

Many Cajuns will add dry or liquid crab or shrimp boil, and a cup of oil, to make the crustaceans spicer and easier to peel.

Our Family Crayfish Farm
 "I was seven years old when my grandfather had this crazy idea of flooding our rice fields after the harvest to produce a second crop--crawfish. Grandfather didn't even finish grade school back in the old days but it did not diminish the fact that he was an innovator, or possessed the ability to accomplish great things.

The Gaspard Family has a claim of being the first commercial crayfish farmers in the State of Louisiana. The only challenge to that claim came from the Trahan family who resided about 12 miles away in a small one-horse town called Duson. I think Mr. Trahan copied my grandfather's successful operation, with his blessings, and they subsequently began their own crawfish farming operation.

Back in the day, we used rudimentary harvesting methods to catch crayfish, namely; pyramid shaped henged wire nets with baits affixed in the center of the net with clothespins. Even then, each year we managed to harvest tons of the delicious mud bugs. 
Later on, we made and used wire traps. The traps were made of  ¾ inch chicken wire formed into a cylindrical shape with a funnel opening at each end. We quadrupled our harvest and the 3/4" openings would allow the immature crayfish to escape the cages to live another day while the big ones remained trapped inside.

We operated our crayfish farm for nearly two decades. Most of the money earned from the farm operation was cold hard cash. This was a windfall for me because it allowed me to buy very first car (a brand new 1963 Chevrolet Super Sport) from the money I made and saved. I was 15 years old at the time.

As word spread, people would travel from miles around just to fish our ponds. Back then we would rent the nets by the dozen, sell bait and soda to anyone who did not have their own fishing equipment. 
I remember one time a business man came by to check out our farm. Before he knew it, we equipped him with a pair of waders, a dozen nets, a number two washtub, and a long cane pole. He fished a couple hours and walked away with about 100 pounds of crayfish. I've never in my life seen a Yankee that excited before.

Folk would place the nets at the very end of the pole and from the levee would strategically place them about 15 feet apart... never getting their feet wet. A dozen nets would usually do the trick. If you didn't walk away with about 100 pounds in an hour, or so, it probably meant you were just playing around and not too serious about fishing.
Back in the day we sold our crayfish for 10 cents a pound when people would harvest their own. If we caught them for you it cost 20 cents a pound.

Later on, when I was in high school, my grandfather would give me all the proceeds from the fish farm just for managing it while he was away pursuing other interests. Some weekends I would pocket around $300 - $400. Not bad for a lanky pimple-faced teenage farm boy..

Crayfish season would last only about 4 months until it was time to plow up the fields and prepare for the next rice harvest. This is when I would go down to the coast to catch shrimp and crab. I used a throw net to catch shrimp and nylon string with chicken necks tied to the end of it to catch crabs. We always had a freezer full of seafood. Those were the good old days."

Bon Appetite!
KT 

Shrimp Au Gratin

  • 2 lbs. shrimp
  • 1 large onion, chopped
  • 3 ribs celery, chopped
  • 1/2 lb.butter
  • 4 Tbs. flour
  • 1 large can milk (12 oz.)
  • 2 egg yolks
  • 10 oz. mild cheddar cheese

Peel uncooked shrimp. Sauté onions and celery in butter. Add milk and blend. Remove from heat then add egg yolks and blend. Now add shrimp and cook for 5 minutes. Next, add cheese, salt, and pepper. Pour mixture into a casserole and top it with more cheese. Bake long enough to melt cheese. Serves 6 to 8.

This can be served over cooked rice or toasted bread.
KT

Shrimp Etouffee (A-2-Fay)

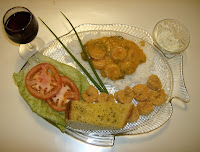
Shrimp Etouffee (A-2-Fay) is just a fancy Cajun French expression for 'smothered' shrimp. The gulf shrimp are slow-cooked in a thick and rich garlic butter sauce. We begin by sautéing the Cajun trinity of vegetables--chopped onions, celery and bell pepper--to bring out the traditional and unmistakable flavors of Cajun-style cuisine.

The meal is simple to prepare and rates highly among the more popular Cajun entrées.

Ingredients

    Shrimp Etouffee (A-2-Fay)
  • 2 lbs. fresh medium shrimp, peeled and deveined
  • 1/2 cup butter
  • 1/2 cup all-purpose flour
  • 1 cup onions, chopped
  • 1 medium bell pepper, chopped
  • 1/2 cup celery, chopped
  • 3 cloves garlic, minced
  • 1 small can tomato juice
  • 1 1/2 cups water
  • salt and pepper to taste

Instructions
    1. melt butter and stir-in flour, onions, celery and bell pepper, mixing well
    2. cook on medium heat until the vegetables become translucent
    3. blend-in the tomato juice, water, garlic and seasonings
    4. simmer on medium-low heat for 30 minutes, stirring frequently
    5. add the fresh medium shrimp and cook for an additional 20 minutes
    6. serve over cooked long grain rice
     Yields 4 to 6 servings.

    Question: How do you smother chicken?
    Answer: Use tiny pillows and sneak-up on 'em while they are sleeping.

    Ahheee!! C'est bon!
    KT

    Tuesday, January 2, 2018

    Bacon-flavored Ol' Time Homemade Cathead Biscuits

    Cathead Biscuits made with hog lard was a very tasty treat at breakfast time when I was a kid growing up on the farm and had a very distinct taste which separated it from today's traditional methods of making biscuits.

    Hog lard was the most used cooking fat in our home at that time. There were also occasions when we used the rendered fat of other animals (chicken and beef) in which to prepare specific meals which were associated with the cut of meat being cooked.

    If you have never experienced the taste of an omelet or scrambled eggs using a couple teaspoons of chicken oil, then you have missed out on some wonderful taste. To learn how to render oil from chicken skins see an earlier post entitled "Cacklin Cracklins".

    Retail hog lard has begun to slowly disappear from the marketplace (even in the deep south) as it is steadily being replaced with processed industrial oils like soy and Canola--the same stuff used in lubricating machinery, running diesel engines, in the formulation of toxic pesticides, as well as for cooking. You can learn more about the toxic effects of soy and Canola oil as a food substance by visiting here.

    Today we are going to bake-up a batch of Ol' Time Homemade Cat Head Biscuits made with bacon drippings. I suppose the reason they might be called "Cat Head" biscuits might be because someone  fashioned the biscuits by hand a little larger than usual and they wound-up looking similar to, and as big as, a cat's head when they were done baking. That sounds like a plausible story to me, so I'm sticking with it. I do remember when one of 'em could just about fill me up back in the old days when I was a boy.

    I don't fashion the biscuit dough with my hands, however. Instead, I use the opened end of a clean empty food can as my biscuit cutter. It gives me more biscuits of normal size (6 - 8 servings).

    This recipe will add a slight bacon flavor to your batch of cat heads. When using bacon drippings keep in mind that it already contains salt from the curing process. Therefore, in this recipe there is no need to add salt when converting the all-purpose flour into self-rising flour.

    Note: To make 1 cup of self-rising flour add 1 1/4 tsp. baking powder, a small pinch of baking soda and 1/4 tsp. salt to 1 cup of all-purpose flour and mix thoroughly.

    As mentioned previously, there is no need to add salt to make your self-rising flour in this recipe because the bacon drippings already contain enough to create the chemical reaction with the baking powder and baking soda that is needed to make the biscuits rise.

    Tip: Liquified bacon drippings can be put in the freezer for a few minutes and it will solidify enough to be cut-in with your flour mix.

    Ingredients

    • 2 cup self-rising flour
    • 3 Tbs. solid and cold hog lard (bacon drippings)
    • 1 cup milk

    Instructions

    1. preheat oven to 450 degrees F.
    2. add self-rising flour into a food blender
    3. using the "Pulse" feature add 1/3 of the cold hog lard at the time until it mixes-in well with the flour
    4. slowly add and pulse the 1 cup of milk into the blender until a soft dough is made
    5. roll out the biscuit dough on a slightly floured cutting board to about 1/2 inch thick
    6. cut your biscuits into circles (the size of a soup can)
    7. place the biscuits onto a slightly oiled pan (touching)
    8. bake at 450 degrees F. for 10 - 12 minutes

    Serves 6 - 8
    Bon Appetit!
    KT

    © 2013 FOOD AJIP. Powered By Blogger